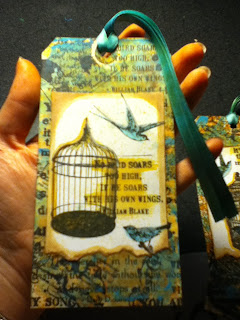
Here it is... my version of the June Tim Holtz Tag! Tim's version can be found here http://timholtz.com/12-tags-of-2013-june/
Grab your tag and a piece of white cardstock (Tim used watercolor paper but I didn't have any on hand.)
Trim the white paper to fit onto the tag and add the torn edge.
Using StazOn stamp your image(s) onto the white paper.
I used a combination of stamps to get a full picture that I liked.
This round I am making 3 (1 to send in the swap I'm hosting on Swap-Bot, 1 to keep, and a spare due to potential flakers like the flaker from the last swap)
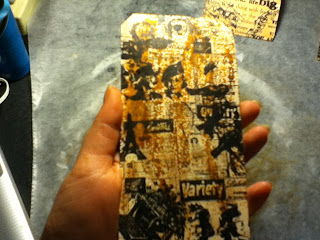
Stamp a background layer of images/ words onto your tag(s) using the StazOn.
Add a second layer of images mostly around the egdes since that's the part that will be seen.
I added color to the background in layers... Taking a piece of wax paper I stamped some color (I'm using Vintage Photo here.)
Take a wet paint brush and run it across the ink to create beads of color.
Lay the tag face down in the ink a press on the back.
This is what 1 layer looks like.
I repeated this step using Wild Honey.
To add bits of opacity I grabbed my acrylic paint (I'm using Anita's in Island Blue) and a plastic bag from Michael's. I cut the plastic bag so that it would lay flat. Then using a wet brush I spread a layer of paint across the bag. The paint seperated a bit into the crinkles.
Press the tag, face down into the paint.
Repeat for as many tags as you're making.
To color in my images on the white paper, I am using a paint brush. I cut another piece of plastic bag and stamp some color onto it.
I then spritzed the ink to make it resemble watercolor paint.
I'm using Wild Honey, Vintage Photo, and Tumbled Glass.
It paints on very nicely.
I tried to follow Tim's directions for how he filled in his image.
For the white bits I just used some white water color paint.
I attempted to get the white in the right spots!
I then glued the white paper to the tags using so Aleene's Tacky Glue.
For the ribbons, I had some blue ribbon on hand that went well with the blue I used in the tag. To make it match better, I alternated sponging on some Wild Honey and Vintage Photo ink.
Tag 1...
Tag 2...
Tag 3...
Very shabby chic and all ready for swapping!


No comments:
Post a Comment
Thanks for Reading!